1940–1943: The North African campaign
Battle of Gazala
- Dates:
- 26 May – 21 June 1942
- Front:
- Mediterranean
- Location:
- Marmarica (Libya): the line from Ain el Gazala (Gazala) on the coast to Bir Hakeim (Bir al-Hakim) in the desert, the area known as the Cauldron between Sidi Muftah and the Knightsbridge crossroads, El Adem, Acroma and Sidi Rezegh, and finally the fortress and port of TobrukOn the battle map →
- Sides:
- Nazi Germany and ItalyErwin Rommel, Ludwig Crüwell, Ettore BasticoUnited Kingdom (with troops from British India and South Africa)Neil Ritchie, Claude AuchinleckFree FrenchMarie-Pierre Koenig
- Result:
- Axis victory. Panzer Army Africa outflanked the Gazala Line from the south, survived a supply crisis in the Cauldron, destroyed the 150th Brigade, repulsed the British counter-attack of 5–6 June, took Bir Hakeim and by 13 June had gained superiority in tanks. Eighth Army abandoned the Gazala Line, and on 21 June Tobruk surrendered with a garrison of about 33,000 men. Rommel was made a field marshal and advanced into Egypt; the British stopped him only in July at El Alamein.
- Author:
- Łukasz
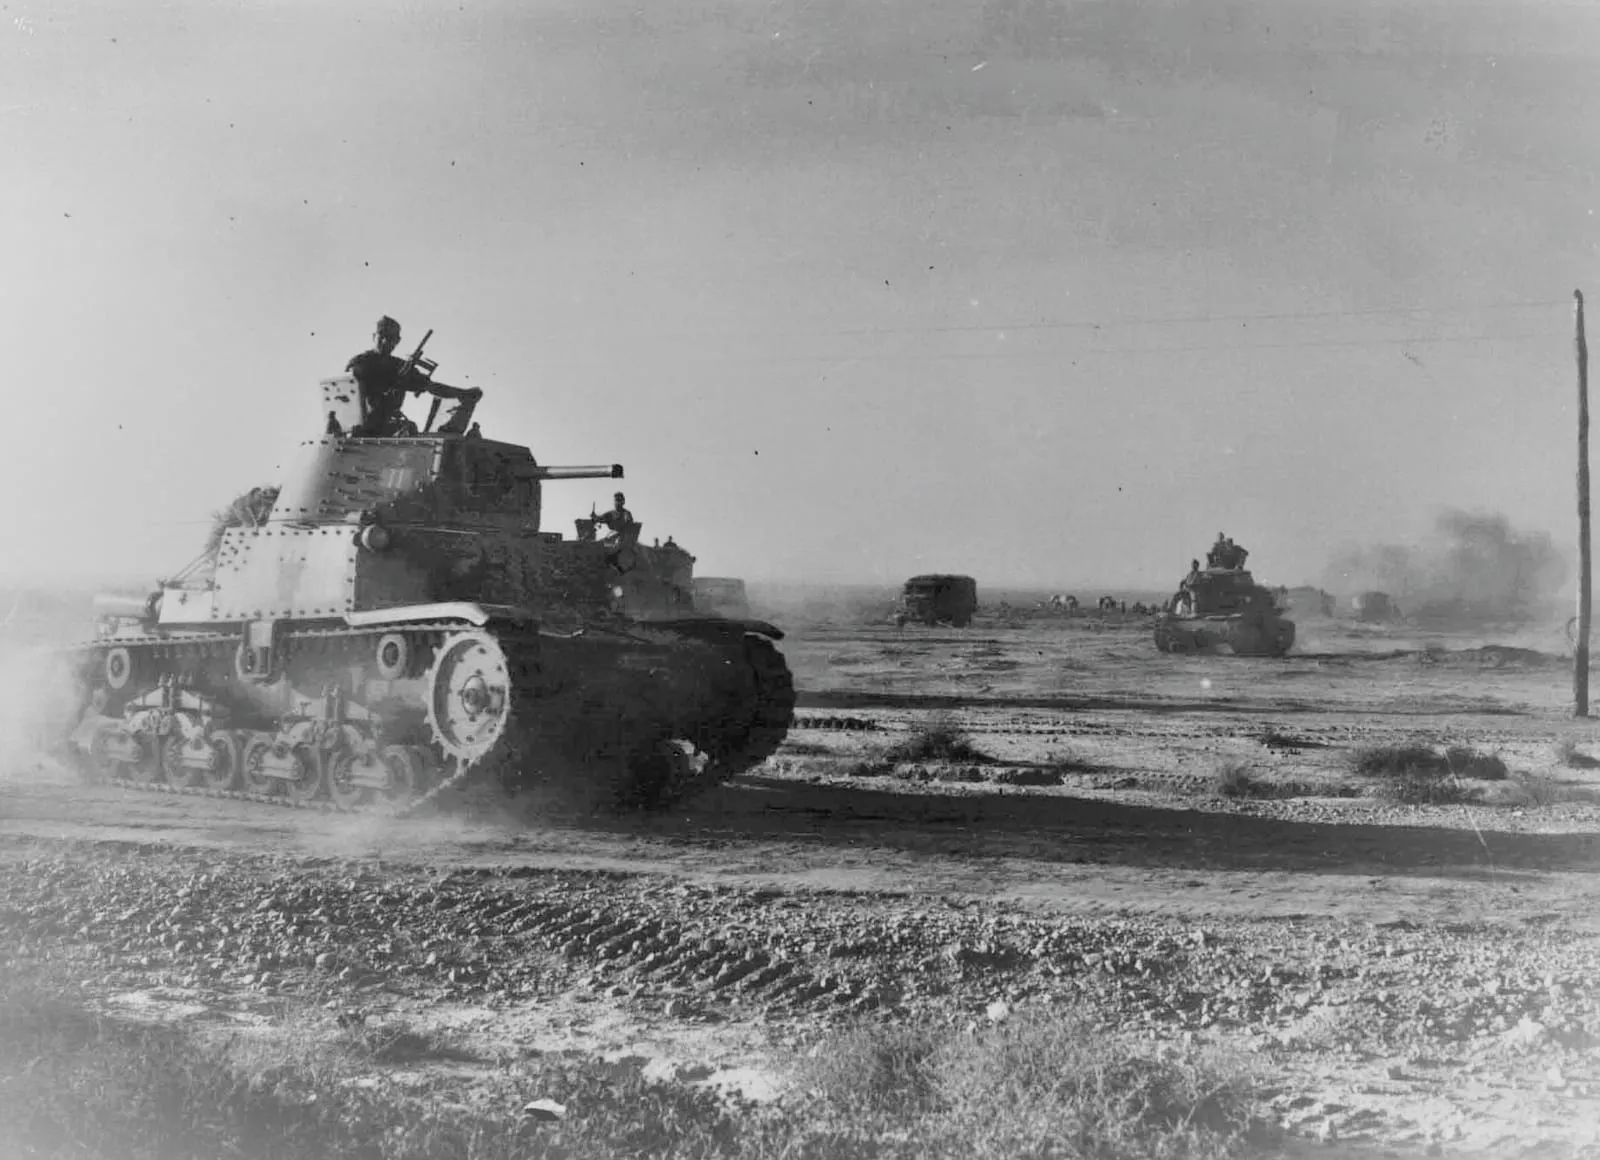
The Battle of Gazala was the greatest victory of Colonel General Erwin Rommel and one of the heaviest defeats suffered by the British Army in the Second World War. For four months, from February to May 1942, the British Eighth Army and the German-Italian Panzer Army Africa faced each other on the Gazala Line, some 60 km west of Tobruk. Both sides were preparing to attack. Rommel was ready first. On the evening of 26 May his mobile divisions set off on a night march around the southern end of the British positions at Bir Hakeim (Bir al-Hakim), and on the morning of 27 May they fell on the rear of Eighth Army.
Rommel’s plan was to destroy the British armoured divisions in a single day. It failed. The Afrika Korps, taken aback by the strength of the new American Grant tanks and by the resistance of the Free French at Bir Hakeim, found itself stranded behind the British minefields without fuel or water. The British, however, could not exploit this. Rommel broke through his own rear to his lines, destroyed the 150th Brigade that barred the way, beat off a belated and poorly coordinated British counter-attack, took Bir Hakeim and on 12 and 13 June smashed the remaining British armoured brigades. Lieutenant General Neil Ritchie’s Eighth Army abandoned the Gazala Line in haste, and on 21 June, after just one day of assault, Tobruk surrendered – the fortress that in 1941 had withstood an eight-month siege.
Name and dates
The battle takes its name from the coastal settlement of Ain el Gazala, where the British defensive line began; in Polish writing it appears as the battle of Gazala or of Ain el Gazala. The name is a convention: the fighting took place mainly several dozen kilometres further south-east, in the desert between Bir Hakeim, El Adem and Tobruk. The Germans gave the whole operation the codename Theseus. “Venezia” was the codeword for one variant of the plan – outflanking the entire line from the south – and since this was the variant carried out, the whole offensive often appears in English-language writing as Operation Venezia (Unternehmen Venezia). The British called the area in which the Afrika Korps stood on the defensive from 30 May the Cauldron; the Germans spoke of it as the “Wurstkessel”.
The start is taken to be 26 May 1942, when at 2 p.m. the Italian corps attacked the centre of the Gazala Line and in the evening the mobile divisions moved off southwards. On this date the sources agree. The end is a matter of convention. Most accounts close the battle on 21 June, the day Tobruk surrendered. The fighting for Tobruk (17–21 June) is sometimes described as a separate battle, the second battle of Tobruk, but it was a direct consequence of the defeat at Gazala. The subsequent pursuit into Egypt, the fighting at Mersa Matruh and the First Battle of El Alamein in July are separate chapters of the campaign.
Background
The race for supplies
At the beginning of February 1942 Rommel’s second offensive had driven Eighth Army from western Cyrenaica back to the Gazala – Bir Hakeim line. Both sides were exhausted, and both knew that the next battle would be won by whoever first built up fuel, ammunition and tanks. That depended on the Mediterranean. From January the German Luftflotte 2 of Field Marshal Albert Kesselring, operating from Sicily, bombed Malta so effectively that for several months the island all but ceased to threaten the convoys to Libya. Until May supplies for the Axis forces averaged about 60,000 tonnes a month, and tanks and guns arrived almost without loss.
The plan for further operations was agreed between Adolf Hitler and Benito Mussolini at their meeting near Salzburg on 29–30 April. At the end of May Rommel was to attack the Gazala Line and take Tobruk, then halt on the Egyptian frontier. The air force would then return to Sicily to support a landing on Malta, called Operation Herkules by the Germans and C3 by the Italians. Only once the island had been taken was a march on Egypt envisaged. Formally Rommel was subordinate to General of the Army Ettore Bastico, the Italian commander-in-chief in Libya, and to the Comando Supremo of Marshal Ugo Cavallero, but in practice it was he who directed the battle.
On the British side a dispute over the timing of an offensive had dragged on since February. The Prime Minister, Winston Churchill, demanded an offensive that would recover the Cyrenaican airfields and bring relief to Malta, and pressed the Commander-in-Chief Middle East, General Claude Auchinleck. Auchinleck wanted first to gain a clear superiority in tanks. On 10 May Churchill sent him a telegram that was in effect an order: Eighth Army was to attack in time to cover the June convoy to Malta. Auchinleck complied, but the British offensive could not begin before June. Meanwhile signals encrypted with Enigma and read at Bletchley Park gave increasingly clear indications that Rommel would strike first, though it was not known exactly when or where.
The Gazala Line
The Gazala Line was not a continuous front. It ran roughly 70 km from the coast into the desert and consisted of so-called boxes: all-round defensive positions held by an infantry brigade with artillery, surrounded by wire and minefields. Between the boxes lay extensive, dense minefields, and the empty space was watched by patrols. The north, where the coast road to Tobruk ran, was the most strongly held: there stood Major General Dan Pienaar’s 1st South African Division and, to its south, the British 50th (Northumbrian) Division. The latter’s 150th Brigade held a box at Sidi Muftah, about 20 km north of Bir Hakeim. These two divisions formed the XIII Corps of Lieutenant General William Gott.
At the very southern end, in a box around the old fort and wells at Bir Hakeim, stood from mid-February the 1st Free French Brigade of Brigadier General Marie-Pierre Koenig – about 3,600 men, including legionnaires of the 13th Demi-Brigade of the Foreign Legion, marine infantry and battalions from Equatorial Africa and the Pacific. Behind the main line the British built further boxes: at the desert crossroads known as Knightsbridge, and at Acroma, El Adem and Retma. Behind them, in reserve, stood the two armoured divisions of Lieutenant General Willoughby Norrie’s XXX Corps: Major General Herbert Lumsden’s 1st Armoured Division and Major General Frank Messervy’s 7th. Tobruk was defended by a garrison drawn mainly from the 2nd South African Division.
The line had two weaknesses. It was designed for static defence, and its southern end could be outflanked across the open desert. The armoured divisions, moreover, were positioned to respond both to a thrust at the centre and to an outflanking move, which in practice meant that the armoured brigades stood far apart.
Forces and plans
At the end of May Eighth Army numbered about 110,000 men – British, South Africans, Indians and Free French – and, according to various tabulations, about 850 tanks. Some 170 of them were new American M3 medium tanks, called the Grant in their British version, with a 75 mm gun in the hull that could destroy German tanks at greater ranges than before and fire high-explosive shells at anti-tank guns. The rest were light American Stuarts, British Crusaders and slow Valentine and Matilda infantry tanks. The infantry had begun to receive 6-pounder anti-tank guns, markedly more effective than the 2-pounders used until then.
Panzer Army Africa numbered about 90,000 men and about 560 tanks, of which roughly 330 were German, mostly Panzer IIIs, and about 230 Italian, the weaker M13/40 and M14/41. Its core was the two panzer divisions of Lieutenant General Walther Nehring’s Afrika Korps – the 15th and 21st – and the 90th Light Afrika Division, together with, on the Italian side, the XX Motorised Corps with the Ariete armoured division and the Trieste motorised division. The weaker Italian infantry divisions of the X and XXI Corps, stiffened with German infantry, faced the northern part of the line under General der Panzertruppe Ludwig Crüwell. Rommel had fewer men and tanks, but he held the advantage in experience, in the organisation of cooperation between tanks and anti-tank guns – including the heavy 88 mm anti-aircraft guns – and in speed of command. Intelligence helped him too: since the autumn of 1941 the Italians and Germans had been reading the detailed reports that the American military attaché in Cairo, Colonel Bonner Fellers, sent to Washington in a cipher believed to be secure.
Rommel’s plan was bold. On the afternoon of 26 May Crüwell’s group was to make a frontal attack on the centre and north of the line to convince the British that the main blow was coming there. Clouds of dust raised by lorries fitted with aircraft engines were to simulate a concentration of tanks. During the night the mobile divisions – Ariete, the 21st and 15th Panzer Divisions and the 90th Light – were to swing round Bir Hakeim from the south, turn north in the morning, destroy the British armoured divisions, reach the sea behind XIII Corps and cut it off from Tobruk. Ariete was to take Bir Hakeim in passing, and Trieste was to cut a gap through the minefields near Sidi Muftah to open a supply route. The whole undertaking was allotted one day, and the capture of Tobruk another two.
Course of the battle
26–27 May: the outflanking march
At 2 p.m. on 26 May, after an artillery preparation, the Italian divisions of Crüwell’s group attacked the centre of the Gazala Line. Some British commanders had long expected an outflanking move from the south, but Eighth Army headquarters remained uncertain for a long time where the main blow was falling. In the evening, by moonlight, the columns of the mobile divisions – some 10,000 vehicles, according to some accounts – set off south-eastwards. British armoured cars reported the movement of large columns, but these reports did not prompt the right response in time.
At dawn on 27 May Ariete ran into the 3rd Indian Motor Brigade, which was still taking up positions a few kilometres south-east of Bir Hakeim. After fierce fighting the brigade was overrun: it lost several hundred killed and wounded and about a thousand prisoners. Having no means of feeding or holding some of them, the Germans and Italians soon released them in the desert; about 600 later reached Bir Hakeim. The first attack by Italian tanks on Bir Hakeim itself broke down on the mines and under the fire of the French 75 mm guns; the Italians lost several dozen tanks.
Further east the 15th Panzer Division ran into the British 4th Armoured Brigade. The Germans won the clash, but discovered to their surprise how far and how accurately the Grants’ guns could shoot. The 4th Brigade fell back towards El Adem. At the same time the armoured cars of the 90th Light Division overran the forward headquarters of the 7th Armoured Division. General Messervy was captured, but he tore off his badges of rank, passed himself off as a batman and soon escaped. For two days the division was practically without a commander.
That day the Germans and Italians were also hit by blows they had not expected. At midday their spearheads were halted by the 1st Armoured Division, and the 90th Light Division, which had reached El Adem and seized the depots there, was driven back the next day. By the evening of 27 May Rommel’s divisions were scattered over a wide area and had lost about a third of their tanks, and the supply columns had to go round Bir Hakeim, exposed to attacks from the French box and from British mobile groups. Popular chronologies state under 27 May that the British used American Sherman tanks against Rommel. This is a mistake: the battle of Gazala saw the debut of the M3 Grant, and the first Shermans went into action only in October 1942 at El Alamein.
28 May – 1 June: the Cauldron and the 150th Brigade
On 28 and 29 May the tank battles continued north of Bir Hakeim, around the high ground of Bir el-Harmat and Sidi Muftah. The British attacked from the north and east, but brigade by brigade, without concentrating their forces. The German tanks were increasingly at a standstill, as fuel and ammunition ran out, and the supply columns going round Bir Hakeim from the south were taking losses. Rommel’s turn against Bir Hakeim is sometimes recorded under 29 May. In fact on that day the Afrika Korps was immobilised east of the minefields for lack of fuel, and Rommel’s main forces were occupied in fighting the British armoured brigades and in saving their own supplies. The reckoning with Bir Hakeim came later, in June. On 29 May a Fieseler Storch liaison aircraft carrying General Crüwell was shot down over the positions of the 150th Brigade, and the commander of the northern group was taken prisoner by the British. His duties were taken over for a few days by Kesselring, who happened to be at army headquarters.
Rommel then took the decision that saved his army. Instead of withdrawing by the same route round Bir Hakeim, on 30 May he pulled his armoured divisions back westwards and set them with their backs to the British minefields, forming a defensive semicircle in front of the gaps that Italian sappers were cutting from the west along the old desert tracks of the Trigh Capuzzo and Trigh el-Abd. The British minefields now protected the Germans. Eighth Army headquarters concluded that the enemy was trapped and called the area the Cauldron. In reality Rommel had created a base for himself in the very middle of the British defences.
The only obstacle in his way was the 150th Brigade in its box at Sidi Muftah (Got el-Ualeb). Cut off from help, it held out from 30 May against attacks by the Afrika Korps, the 90th Light Division and the Italian Trieste; on 31 May the Germans launched a general assault, which Rommel directed in person. The British armoured divisions did not come to its aid. On the afternoon of 1 June, after raids by Junkers Ju 87 dive-bombers, the box fell. The brigade commander, Brigadier Cecil Haydon, was killed, and according to Rommel about 3,000 men were taken prisoner and more than a hundred tanks and armoured vehicles and more than 120 guns were destroyed or captured. From then on supplies reached the Cauldron by a short route through the minefields.
Bir Hakeim
Bir Hakeim was now the last point of the British line that threatened Rommel. From the first day the French garrison did more than had been expected of it: patrols in Bren Carriers sallied out of the box and destroyed German and Italian vehicles on the supply routes, and on 31 May a column of lorries brought in water and took out the wounded and prisoners. On 2 June Bir Hakeim was surrounded by the 90th Light Division and Trieste. Two Italian officers brought a demand for surrender; Koenig refused.
For the next nine days the box was bombed by German and Italian aircraft – according to figures cited in the literature, dive-bomber raids came several times a day – and shelled by artillery. Successive assaults by infantry, sappers and tanks broke down on the mines and in well-prepared positions. The Desert Air Force of Air Vice-Marshal Arthur Coningham intercepted the raids and dropped supplies to the defenders. On 8 June Rommel sent part of the 15th Panzer Division against Bir Hakeim and personally directed an attack from the north. On 9 and 10 June, with mounting losses and ammunition running out, the French lost some of their positions.
On the night of 10–11 June, with the consent of the British command, the brigade broke out of the encirclement through a narrow gap in the minefields, under fire and amid confusion, towards a rallying point where British lorries and ambulances were waiting. Koenig rode at the head of the column in a car driven by an Englishwoman, Susan Travers. Of the garrison’s roughly 3,600 men, about 2,700 got out, including 200 wounded. Several hundred, most of them wounded, were taken prisoner on the morning of 11 June when the 90th Light Division occupied the position. According to the American historian Douglas Porch, Hitler ordered that German political émigrés captured in the Legion be shot, and Rommel did not carry out the order.
The Battle of Bir Hakeim did not change the outcome at Gazala, but for two weeks it forced Rommel to supply his forces by a roundabout route, tied down his troops and gave Eighth Army time. For Free France it was the first major engagement with the Germans since 1940 and proof that its soldiers were allies of full worth. General Charles de Gaulle made use of it in his dealings with London and Washington, and on 12 June Auchinleck wrote that the United Nations owed the French soldiers and their gallant general admiration and gratitude.
5–6 June: Operation Aberdeen
From Cairo, Auchinleck pressed Ritchie to exploit the supposed weakness of the Germans and strike west along the coast. Ritchie decided instead to attack the Cauldron itself. Operation Aberdeen opened at 2.50 a.m. on 5 June. The 7th Armoured Division and the 5th Indian Division were to attack from the east, and the 32nd Army Tank Brigade from the north. The artillery preparation, which was meant to destroy the German anti-tank screen, fell too far to the east because of a mistake in fixing its position. The 22nd Armoured Brigade drove straight into the fire of the anti-tank guns, and the 32nd Brigade lost about 50 of its 70 tanks in the morning.
In the afternoon Rommel counter-attacked. Ariete and the 21st Panzer Division struck east, and the 15th Panzer Division broke out of the Cauldron to the north. The headquarters of two British divisions and two Indian brigades were overrun, and three Indian battalions, a reconnaissance regiment and four artillery regiments, left without tank support, were destroyed one after another on 6 June. In two days the British lost, by various estimates, several thousand men, a large proportion of them prisoners, and more than a hundred tanks. The initiative had returned to Rommel.
11–13 June: Knightsbridge and “Black Saturday”
After the fall of Bir Hakeim Rommel moved in full strength east and north, towards El Adem and the Knightsbridge box, held by the 201st Guards Brigade. On 12 June the German panzer divisions attacked the British armoured brigades, which once again went into action one at a time. The Germans combined tanks with anti-tank guns, drew the British tanks onto their fire and finished them off; they also made use of interception of British radio traffic.
By the evening of 13 June the British armoured divisions, which two weeks earlier had had several hundred tanks, had, according to British tabulations, about 70 serviceable machines. The Afrika Korps had superiority in tanks and dominated the battlefield. During the night the Guards abandoned Knightsbridge. In Eighth Army the day became known as “Black Saturday”.
14–17 June: the retreat from Gazala
On 14 June Auchinleck agreed to the withdrawal of the divisions from the Gazala Line before they were cut off. The 1st South African Division got away by night along the coast road almost intact. Two brigades of the 50th Division, for which there was no room on the road, broke out westwards through the lines of the Italian Brescia and Pavia divisions, turned south across the desert and made their way by a roundabout route to the Egyptian frontier. The soldiers called this hurried retreat the “Gazala Gallop”.
Tobruk was at the centre of a dispute. In February the British commanders-in-chief in Cairo had agreed that the fortress should not be made to withstand a second siege, and since the siege of 1941 its defences had been neglected and some of its mines lifted for the Gazala Line. Churchill, however, attached immense symbolic importance to Tobruk, and even before the decision to retreat he telegraphed that withdrawal “would be fatal”; on 14 June he asked whether there was any question of giving up Tobruk. Auchinleck ordered Ritchie to hold a line from Acroma through El Adem to Bir el-Gubi, which would cover the fortress from the west and south. The line did not hold. On 15 and 16 June the Germans took further boxes, and on the night of 16–17 June the British abandoned El Adem. On 17 June the Afrika Korps smashed the last British armoured units in the area at Sidi Rezegh and reached the sea at Gambut. Ritchie withdrew the rest of the army towards the Egyptian frontier, and Tobruk was cut off.
20–21 June: the fall of Tobruk
From 15 June the Tobruk garrison was commanded by Major General Hendrik Klopper, who had commanded the 2nd South African Division for only a month and had no experience of leading a large formation in battle. Under his orders were about 33,000 men: two South African brigades, the 201st Guards Brigade, the 11th Indian Brigade, the 32nd Army Tank Brigade with several dozen tanks, and artillery, but also thousands of rear-echelon troops and labourers. The perimeter of the fortress was more than 50 km long.
Rommel attacked according to a plan prepared back in the autumn of 1941 – from the south-east, where the ground was flat. At 5.20 a.m. on 20 June German and Italian bombs fell on a narrow sector of the perimeter held by the 11th Indian Brigade; according to British tabulations, Luftwaffe aircraft flew nearly 600 sorties that day. Sappers bridged the anti-tank ditch, and the divisions of the Afrika Korps and Ariete entered the fortress. The British tank counter-attack came too late and with too few forces. By evening the Germans were in the harbour, and British sappers were burning fuel stocks and depots. The South African brigades in the western part of the fortress did almost no fighting.
During the night Klopper considered breaking out, but his division lacked sufficient vehicles, and the main ammunition dumps were already in enemy hands. On the morning of 21 June he decided to surrender; Ritchie, unaware of the situation, left the decision to him. Klopper surrendered to Rommel on the Via Balbia west of the town. Some units that had not received the order fought on until evening, and a few small groups broke out to the east. About 33,000 men were taken prisoner, more than 10,000 of them South Africans. It was the largest surrender of British forces in the war after the fall of Singapore. The Germans and Italians also captured more than a thousand serviceable vehicles, several thousand tonnes of food and about 1,400 tonnes of fuel – stocks that allowed Rommel to press on.
Losses
Figures for the losses vary according to the source and the method of counting. According to tabulations cited in the literature, Eighth Army lost about 50,000 men killed, wounded and captured over the whole battle, including about 33,000–35,000 prisoners at Tobruk, as well as many hundreds of tanks, some of which were recovered and repaired. At the end of June it had fewer than 200 serviceable tanks in Egypt. German losses are estimated at about 3,300–3,400 killed, wounded and missing, Italian losses at about 3,000; on 30 June the Afrika Korps reported that it had only a few dozen tanks in running order. According to some accounts the Free French lost about 140 killed, more than 200 wounded and several hundred prisoners at Bir Hakeim.
Significance
The Battle of Gazala brought Rommel to the peak of his fame. On 22 June Hitler promoted him to field marshal; Rommel is said to have told his wife later that he would rather have been given one more division. The defeat was also a blow to Churchill, who learned of the fall of Tobruk on 21 June at the White House, from President Franklin Delano Roosevelt. When Roosevelt asked how he could help, Churchill asked for as many new Sherman tanks as possible; in July the Americans sent about 300 Shermans and 100 self-propelled guns to Egypt – and it was these tanks, not any at Gazala, that fought at El Alamein in the autumn. At home the Prime Minister had to face a motion of no confidence, which the House of Commons rejected by an overwhelming majority at the beginning of July.
The victory overturned the plan agreed near Salzburg. Citing the stocks captured at Tobruk and the pessimistic reports of Colonel Fellers, Rommel convinced Hitler that he could reach the Suez Canal before the British recovered. Hitler, who distrusted the Malta landing, agreed, and Mussolini gave way. Operation Herkules was postponed and later abandoned. The aircraft that were to have covered the landing followed Rommel into Egypt.
On 25 June Auchinleck relieved Ritchie and took personal command of Eighth Army. He did not defend Mersa Matruh to the end – in the fighting around that port on 26–29 June X Corps lost thousands of prisoners – and withdrew the army to a position at El Alamein, only about 100 km from Alexandria, between the sea and the impassable Qattara Depression. In July, in the First Battle of El Alamein, he halted the exhausted Panzer Army Africa, whose tanks and men were dwindling at the end of a supply line more than a thousand kilometres long. In August Churchill replaced Auchinleck with General Harold Alexander, and command of Eighth Army went – after Gott had been killed when his aircraft was shot down – to Lieutenant General Bernard Montgomery.
Gazala laid bare the weaknesses of the British Army in 1942: the dispersal of armoured brigades, poor cooperation between tanks, infantry and artillery, and slow command divided between Cairo and Eighth Army headquarters. The British had more men and tanks, and yet they were beaten piecemeal. At the same time Rommel’s success contained the seeds of defeat. The decision not to take Malta allowed the island to revive, and its submarines and aircraft once again began to sink Axis convoys. Panzer Army Africa stood at El Alamein on the threshold of the Nile Delta, but exhausted and cut off from its ports. In October and November 1942 it lost the second battle there, which ended its march on Egypt.