1940–1943: The North African campaign
First Battle of El Alamein
- Dates:
- 1–27 July 1942
- Front:
- Mediterranean
- Location:
- The El Alamein position (Al-Alamayn) in north-western Egypt: a belt of desert some 60 km long from the Mediterranean coast to the Qattara Depression, with the Tel el Eisa, Miteirya and Ruweisat ridges and the El Mreir depressionOn the battle map →
- Sides:
- United Kingdom (with troops from Australia, New Zealand, British India and South Africa)Claude Auchinleck, Eric Dorman-Smith, Leslie MorsheadNazi Germany and ItalyErwin Rommel, Ettore Bastico
- Result:
- Tactically indecisive, a strategic British victory. Eighth Army repulsed Rommel's attack of 1–3 July and forced him onto the defensive, broke several Italian divisions and captured a German radio intercept company, but its counter-attacks of 14–27 July collapsed with heavy losses. The front froze some 100 km from Alexandria; the Axis advance on the Nile Delta and the Suez Canal had been stopped.
- Author:
- Łukasz
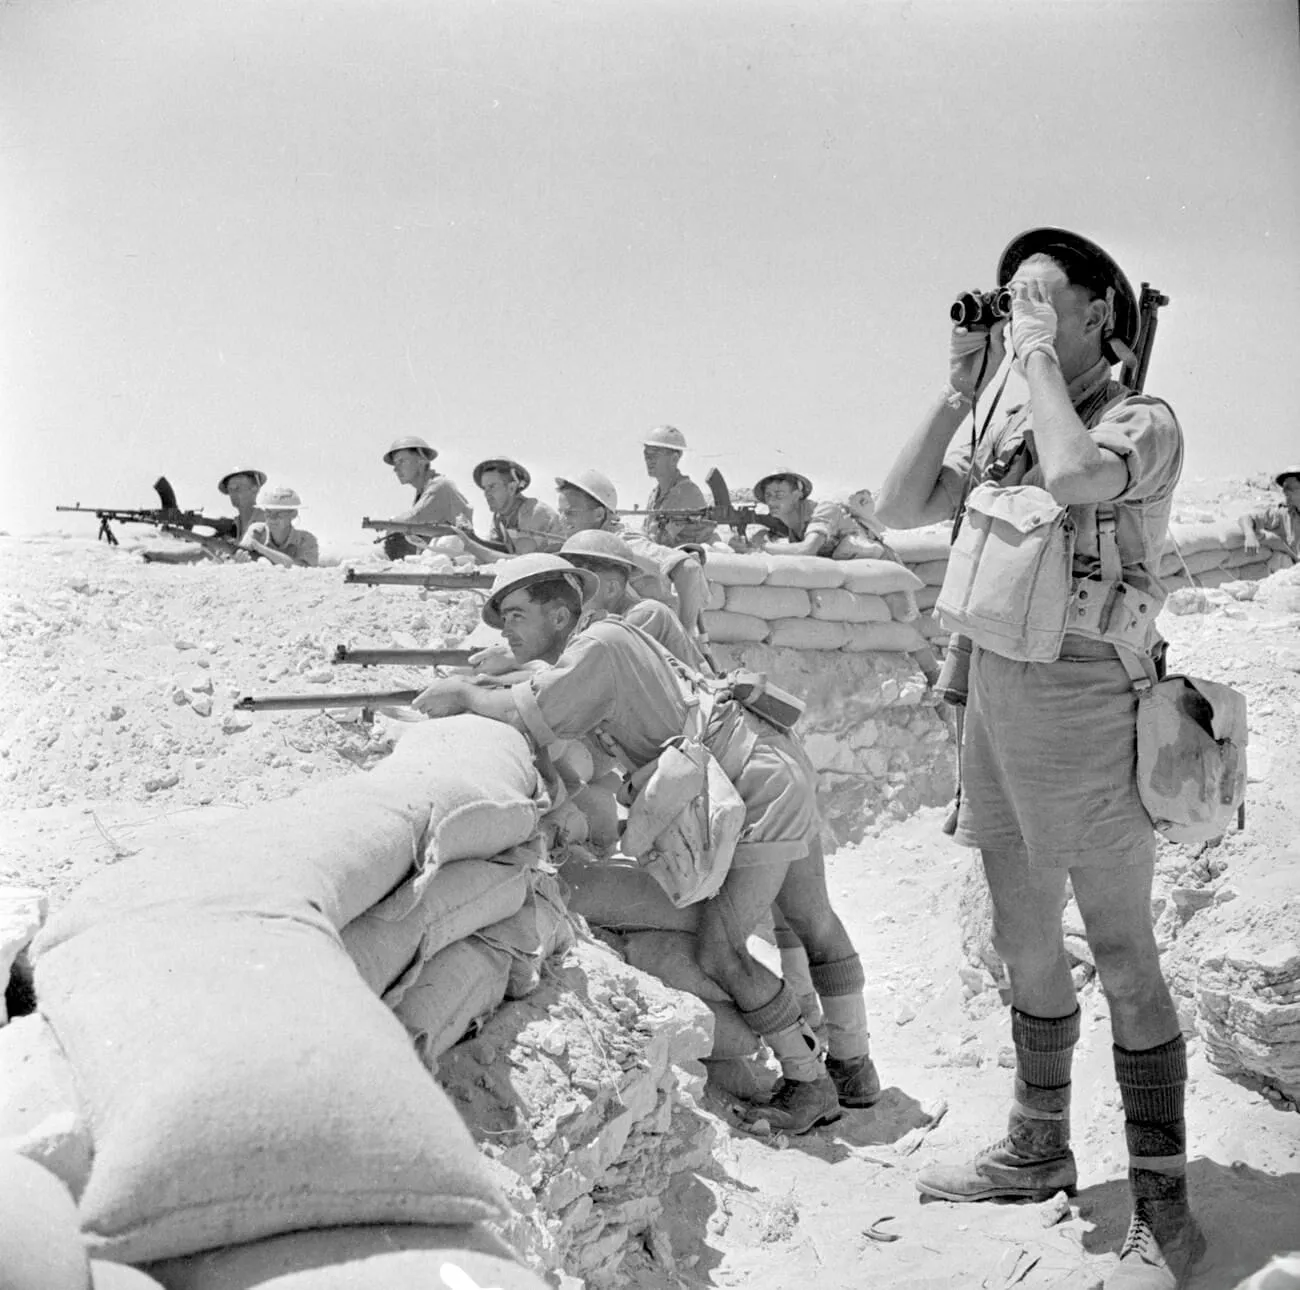
The First Battle of El Alamein was where Field Marshal Erwin Rommel’s victorious march on Egypt came to a halt. After the Battle of Gazala, the fall of Tobruk and the rout of Eighth Army at Mersa Matruh, the German-Italian Panzer Army Africa stood at the end of June 1942 at the gates of the Nile Delta. Only about 100 km separated it from Alexandria, the main base of the British Mediterranean Fleet. In Cairo secret documents were being burned, and Benito Mussolini waited in Libya for his triumphal entry into the Egyptian capital.
Throughout July General Claude Auchinleck, the British Commander-in-Chief Middle East, who on 25 June had taken personal command of Eighth Army, held the position between the sea and the Qattara Depression. In the first three days he repulsed the attack of Rommel’s exhausted divisions. He then went over to counter-attacks of his own, striking mainly at the Italian divisions: he took the Tel el Eisa hills by the sea, broke several Italian divisions and deprived Rommel of his most valuable source of information – his radio intercept company. None of the subsequent British attacks, however, achieved a breakthrough. The infantry took its objectives by night and in the morning, left without the support of tanks that arrived too late, fell victim to German counter-attacks. By the end of July the front had frozen. Egypt and the Suez Canal remained in British hands.
Name and dates
The battle takes its name from the small railway station of El Alamein (Al-Alamayn) on the coastal line from Alexandria to Mersa Matruh. The word “First” distinguishes it from the second, decisive battle of October and November 1942. The July fighting consisted of several distinct engagements, which in English-language literature have names of their own: the fighting for Tel el Eisa (10–16 July), the First Battle of Ruweisat Ridge (14–16 July, Operation Bacon), the Second Battle of Ruweisat Ridge, also called the Battle of El Mreir after the depression in which its bloodiest episode took place (21–23 July, Operation Splendour), and the attack on Miteirya Ridge (26–27 July, Operation Manhood).
The battle is taken to have begun on 1 July 1942, when at dawn the 90th Light Division and the Afrika Korps advanced on the British position. Sources agree on this date; the first skirmishes between advance guards had already taken place on 30 June. The end is a matter of convention. It is usually given as 27 July, the day Operation Manhood, the last British attempt at a breakthrough, collapsed; most studies date the battle this way. Auchinleck formally ended offensive operations by an order of 31 July, by which time the front saw only patrol clashes and artillery fire.
Background
The pursuit into Egypt
After taking Tobruk on 21 June 1942, Rommel, promoted to field marshal the following day, persuaded Adolf Hitler and Mussolini that he could reach the Suez Canal before the British recovered. The landing on Malta planned for the summer was postponed, and the aircraft that were to have covered it followed Rommel into Egypt. The chief of the Italian Supreme Command, General Ugo Cavallero, and the commander of the Luftwaffe in the south, Field Marshal Albert Kesselring, warned that the panzer army was moving ever further from its ports and that Malta would once again begin to sink convoys. Rommel’s formal superior was the Italian Governor of Libya and Axis commander-in-chief in North Africa, General Ettore Bastico, but in practice the field marshal ran the campaign his own way, appealing directly to Rome and Berlin.
Rommel’s forces, however, were at the end of their strength. On 30 June, according to German reports, the Afrika Korps had 55 serviceable tanks and the Italians a dozen or so. The German divisions were drastically depleted, many infantry companies were down to a few dozen men, and the troops had been fighting and driving for weeks with almost no sleep. The supply line from Tripoli was over 2,000 km long, and from Benghazi over 1,000 km. Eighth Army, meanwhile, was falling back on its bases, which now lay right behind it.
The El Alamein position
The El Alamein position was the only place in the Western Desert that could not be outflanked from the south. Some 60 km from the coast began the Qattara Depression – a vast basin below sea level, with treacherous salt marshes and steep escarpments, impassable to armoured columns. It was not, however, a line in the strict sense. Lieutenant General William Norrie, commander of XXX Corps, had prepared three fortified “boxes” – strongpoints for a brigade or a division, surrounded by minefields and barbed wire. The strongest, around the El Alamein station itself by the sea, was held by the 1st South African Division. The second, Bab el Qattara (called Kaponga by the New Zealanders), lay some 32 km from the coast and had merely been dug. Between them stretched flat, stony desert, cut by a few low ridges running from east to west: Tel el Eisa by the sea, Miteirya Ridge and – in the middle of the position, about 16 km from the sea – Ruweisat Ridge, which offered a view over many kilometres. Between them lay shallow depressions, marked on maps with the word “deir”: Deir el Shein, Deir el Abyad, El Mreir.
X Corps had been scattered at Mersa Matruh, so Auchinleck had to man the position with whatever had managed to withdraw. The north, together with the El Alamein box, fell to XXX Corps (the 1st South African Division and the remnants of the 5th and 10th Indian Divisions), the south to Lieutenant General William Gott’s XIII Corps (the 2nd New Zealand Division and units of the 4th Indian Division). The remnants of the 1st and 7th Armoured Divisions formed a mobile reserve. Into the middle of the position, the Deir el Shein depression west of Ruweisat Ridge, the 18th Indian Brigade arrived at the last moment, on 28 June, straight from Iraq.
Panic in Egypt
The fall of Mersa Matruh set off a panic in Egypt which the British later called “the Flap”. In the last days of June Admiral Henry Harwood took the ships of the Mediterranean Fleet out of Alexandria to ports in Palestine, Lebanon and the Suez Canal. On 1 July, a day that became known as “Ash Wednesday”, secret documents were burned at General Headquarters in Cairo, in rear units and at the British Embassy. Preparations were made to defend Alexandria and the approaches to Cairo, and parts of the Nile Delta were flooded in case Rommel outmanoeuvred Eighth Army once again. Mussolini, convinced that victory was at hand, flew to Libya on 29 June to prepare his entry into Cairo.
Auchinleck commanded from a forward tactical headquarters in the desert, and his closest adviser was Major General Eric Dorman-Smith, Deputy Chief of the General Staff in the Middle East, whom Auchinleck had brought to Eighth Army as his de facto chief of staff. Dorman-Smith, a brilliant but unpopular officer, was a co-author of the method of the July fighting: instead of seeking a decisive armoured battle, strike where the front was held by the weaker Italian divisions and force Rommel to disperse his few German units to rescue his allies. Intelligence helped. At Bletchley Park the British were reading some of the messages enciphered with Enigma, especially those of the Luftwaffe, and in July they knew the enemy’s dispositions and strengths with growing precision. Rommel, meanwhile, was losing his best source: at the end of June the Americans, warned by the British, changed the cipher in which the military attaché in Cairo, Colonel Bonner Fellers, had been sending Washington detailed reports on British forces and plans. For months these had been read by the Italians and the Germans. On 7 July Fellers was recalled from Cairo.
Course of the battle
1–3 July: Rommel’s attack
Rommel intended to strike as he had at Gazala and Mersa Matruh – fast, before the enemy could steady himself. The 90th Light Division was to break through between the El Alamein box and Deir el Abyad and turn north towards the sea, cutting off the box’s garrison, while the Afrika Korps was to turn south into the rear of XIII Corps. The attack, planned for 30 June, was delayed by a day by shortages of fuel and transport.
At 3 a.m. on 1 July the 90th Light Division set off eastwards, but it veered too far north, ran into fire from the South Africans in the El Alamein box and went to ground. The 15th and 21st Panzer Divisions were held up first by a sandstorm and then by air attacks. When, in full daylight, they had worked their way round Deir el Abyad, they came up against the 18th Indian Brigade at Deir el Shein. The brigade, supported by 23 25-pounder gun-howitzers, 16 new 6-pounder anti-tank guns and 9 Matilda tanks, held out all day and was overwhelmed in the evening; most of its men were taken prisoner. Its resistance, however, gave Auchinleck time to organise the defence of the western end of Ruweisat Ridge. Towards evening the 1st Armoured Division pushed the 15th Panzer Division back westwards. By the end of the day the Afrika Korps had 37 tanks left of its 55.
On 2 July Rommel renewed the attack. The 90th Light was stuck again, so the field marshal abandoned the outflanking move to the south and sent the Afrika Korps east along Ruweisat Ridge to break through to the coast road. The ridge was defended by an improvised artillery group under Brigadier Robert Waller. It held out until the afternoon, when the 4th and 22nd Armoured Brigades came up and drove off the German tanks. The British air force ruled the skies over the battlefield. The Desert Air Force, supported by the Americans, bombed Axis columns and airfields, flying several hundred sorties a day during this period.
On 3 July the Afrika Korps, now with only 26 serviceable tanks, again attacked Ruweisat, screened to the south by the Italian XX Corps. Meanwhile the New Zealanders struck north from the Kaponga box into the enemy’s flank and ran into the artillery of the Ariete Armoured Division. The division lost over 500 men, including some 350 prisoners, 36 guns and almost all its tanks; by evening it had five. The attack on Ruweisat collapsed once more.
4–9 July: Rommel goes over to the defensive
On 4 July Rommel concluded that without rest and reinforcements he could advance no further. He reported to Berlin that his three German divisions were each down to only 1,200–1,500 men and that bringing up supplies was becoming ever harder in the face of the enemy’s air superiority; he expected to remain on the defensive for at least two weeks. The figures from Italy spoke for themselves: in June the army received about 5,000 tonnes of supplies, against over 30,000 in May, and 400 vehicles against 2,000. This moment is regarded as the end of the immediate threat to Egypt.
Auchinleck went over to counter-attacks at once. On 5 July the New Zealanders tried to strike at El Mreir in the rear of the Ariete, but were stopped by the fire of the Italian Brescia Division. Meanwhile reinforcements were arriving at the front. At the beginning of July the 9th Australian Division of Lieutenant General Leslie Morshead, veterans of the 1941 defence of Tobruk, brought in from Syria, took its place in the northern sector. In the process Morshead had a sharp dispute with Auchinleck: he refused to allow the Australian brigades to be split up among British formations and gave way only when the whole division went into action under his command. Command of XXX Corps passed to Lieutenant General William Ramsden.
10–16 July: Tel el Eisa and the 621st Company
The first major British attack was a thrust along the coast against the low hills of Tel el Eisa and Tel el Makh Khad. It was meant to draw Rommel’s forces away from the south. At 3.30 a.m. on 10 July the heaviest artillery preparation yet seen in North Africa began. It fell on the newly arrived Italian Sabratha Infantry Division, which had not had time to dig in. The division broke and scattered. The Australian 26th Brigade, with tanks of the 44th Royal Tank Regiment, took the ridge by Tel el Eisa station and captured over 1,500 prisoners, and by midday the South Africans had occupied Tel el Makh Khad. Rommel personally threw whatever he had to hand into the threatened sector: units of the German 164th Light Division, the Italian Trieste Motorised Division and the 15th Panzer Division. Their counter-attacks broke on the Australian artillery and anti-tank guns.
In the process the Australians destroyed a unit whose loss hurt Rommel more than the defeat of a whole division. On a hill just behind the front line stood two platoons of the German 621st Radio Intercept Company under Lieutenant Alfred Seebohm. The company intercepted the careless radio traffic of British units, often conducted in clear or in simple codes, and gave Rommel a picture of the British dispositions, often in real time. Seebohm, who happened to be visiting his platoons, was badly wounded and died soon afterwards. Several dozen of his men were captured and, more importantly, so were documents that had not been destroyed in time: daily and monthly reports, lists of code names and codes, analyses of British signals. From them the British learned how much their own radio traffic had been telling the enemy, and they quickly tightened radio discipline. The loss of Seebohm’s company, less than two weeks after the Fellers leak had been stopped, deprived Rommel of both his best intelligence sources.
On 11 July the Australians took the western end of Tel el Eisa (Point 24), and their raid on Deir el Abyad forced an Italian infantry battalion to surrender; over a thousand more prisoners were taken that day, mostly from the Trieste Division. On 12 and 13 July the 21st Panzer Division counter-attacked the Australian positions and the El Alamein box, where the attack was stopped at close range by South African artillery and infantry. The fighting for Point 24 went on until 16 July and was costly for both sides. According to estimates by the 9th Australian Division, in the week-long fighting for Tel el Eisa the enemy lost at least 2,000 killed and over 3,700 prisoners. Rommel had to move some of his German tanks north, weakening the centre of the front.
14–16 July: the First Battle of Ruweisat Ridge
With the German reserves drawn north, Auchinleck struck at the centre of the front, at Ruweisat Ridge, held by the Italian Pavia and Brescia Infantry Divisions. His directive said plainly that the Italians should be hit wherever possible, because their morale was low and the Germans could not hold an extended front without them. Under the plan for Operation Bacon, the 4th and 5th New Zealand Brigades were to take the western part of the ridge in a night attack and the 5th Indian Brigade the eastern part. At dawn the 2nd Armoured Brigade was to pass through the captured ground, while the 22nd Armoured Brigade covered the infantry from the south.
The 2nd New Zealand Division was no longer commanded by General Bernard Freyberg, badly wounded at Minqar Qaim on 27 June; his place was taken by Brigadier Lindsay Inglis. The attack went in at 11 p.m. on 14 July. Before dawn the New Zealanders took their objectives, but in the darkness they had bypassed many Italian and German pockets of resistance, which then cut them off. Anti-tank guns, heavy weapons and reserves failed to reach the ridge, and neither British armoured brigade moved off in time. At dawn on 15 July tanks of the 8th Panzer Regiment of the 15th Panzer Division knocked out the few anti-tank guns of the 22nd New Zealand Battalion, and the infantry, exposed in open ground, had to surrender; some 350 men were taken prisoner. The Indians at the eastern end of the ridge advanced slowly and took their objectives only with the help of tanks, which reached them around midday.
Rommel, seeing that the Pavia and Brescia were crumbling, gathered units from north and south under the commander of the Afrika Korps, General Walther Nehring. At 5 p.m. on 15 July Nehring struck the 4th New Zealand Brigade, which had neither anti-tank guns nor ammunition left. Another 380 or so New Zealanders were taken prisoner, and at 6 p.m. the brigade headquarters fell. Among the prisoners was Captain Charles Upham, wounded in fighting in which he had destroyed German vehicles with grenades – for this he received a second Victoria Cross, one of only three men ever to do so. Only the 2nd Armoured Brigade stopped Nehring’s attack. On 16 July the Germans attacked again, but the Indians, forewarned by signals intercepts, had dug in their anti-tank guns and drove them off, leaving 24 wrecked tanks on the field.
The outcome was ambiguous. In the three days of fighting the British took over 2,000 prisoners, mostly from the Brescia and Pavia Divisions, and held the eastern part of the ridge, but the 2nd New Zealand Division lost 1,405 men. The New Zealanders long bore a grudge against the British armour for leaving them at the mercy of the German tanks. After the fighting for Tel el Eisa and Ruweisat, three Italian divisions had been all but destroyed. Rommel had to intermingle German and Italian units to stiffen the front and lay ever denser minefields in front of it.
On 17 July, to relieve the pressure on Ruweisat, the 24th Australian Brigade attacked Miteirya Ridge, which the Australians called Ruin Ridge, from the north. The night attack yielded 736 prisoners from the Trento and Trieste Divisions, but a counter-attack forced the Australians back to their start line with the loss of about 300 men.
21–23 July: El Mreir
By the third week of July Eighth Army had an overwhelming material superiority. The 1st Armoured Division alone had 173 tanks, including 61 American Grants, and more were arriving, while by British reckoning Rommel had 38 German and 51 Italian tanks at the front, though about a hundred more were in the workshops. Auchinleck decided to exploit this superiority in a second attack in the centre of the front, Operation Splendour. The 161st Indian Brigade was to strike along Ruweisat Ridge towards Deir el Shein, and the 6th New Zealand Brigade from the south against the El Mreir depression. At dawn the 2nd and the newly arrived 23rd Armoured Brigades were to pass through the gap. The plan was ambitious and complicated.
The infantry attack began on the evening of 21 July. The New Zealanders took the El Mreir depression, but once again most of their vehicles carrying heavy weapons failed to reach them. At dawn on 22 July the British tanks again failed to appear; instead Nehring’s 5th and 8th Panzer Regiments launched a lightning counter-attack and overran the infantry crowded into the depression. The 6th New Zealand Brigade lost over 900 men. Two regiments of the 2nd Armoured Brigade, sent to its aid, got stuck on mines and under anti-tank fire. The 161st Indian Brigade achieved only partial success: it took the western end of Ruweisat Ridge but was driven out of Deir el Shein in hand-to-hand fighting.
The defeat was completed by the 23rd Armoured Brigade, which had arrived from England a few weeks earlier. The commander of the 1st Armoured Division, Major General Alexander Gatehouse, was not convinced that gaps had been cleared in the minefields and proposed calling off the attack; Gott merely shifted the axis of advance, but this order did not arrive in time. At 8 a.m. the brigade, carrying out its original orders to the letter, moved off westwards, drove into the minefields under anti-tank fire, and at 11 a.m. a counter-attack by the 21st Panzer Division forced it to withdraw. Of its 104 tanks the brigade lost, according to various counts, between 87 and 93 – about 40 destroyed and the rest badly damaged – and ceased to exist as a fighting unit. A night attack by the 5th Indian Division on Deir el Shein on 23 July also failed.
In the north, on 22 July, the Australians attacked Tel el Eisa and Tel el Makh Khad once more. In the fighting for the hills Private Arthur Stanley Gurney of the 2/48th Battalion single-handedly took three machine-gun posts with the bayonet and was killed; he was awarded a posthumous Victoria Cross. In the evening the attack on Tel el Makh Khad was supported by the 50th Royal Tank Regiment, which had not been trained in cooperation with infantry. Tanks and infantry attacked separately, and the regiment lost 23 tanks. Rommel, although he was beating off the attacks, reported that his infantry had suffered such heavy losses that the situation was “critical in the extreme”.
26–27 July: Operation Manhood
Auchinleck decided on one more attack – at least the fifth in July and the third in the northern sector – reinforcing XXX Corps with the 1st Armoured Division, the 4th Light Armoured Brigade and the fresh 69th Infantry Brigade of the 50th Division. On the night of 26/27 July the South Africans were to clear a gap in the minefields south-east of Miteirya Ridge. The 24th Australian Brigade was to take the eastern end of the ridge, and the 69th Brigade was to pass through the gap towards Deir el Dhib. Behind them the 2nd Armoured Brigade and the 4th Light Armoured Brigade were to follow, striking at the Axis supply lines.
The enemy was expecting the attack, and the plan had again been prepared in haste. The Australians took their objectives on Miteirya Ridge by 2 a.m., and the 69th Brigade by about 8 a.m. But the anti-tank guns lost their way in the dark or got stuck in the minefields, reports on the gaps in the mines were contradictory, and the 2nd Armoured Brigade waited. Rommel counter-attacked at once. German armoured battle groups overran two forward battalions of the 69th Brigade. The 50th Royal Tank Regiment, which was to support the Australians, could not find the gaps in the minefields and lost 13 tanks under fire. Left alone on the ridge, the Australian 2/28th Battalion was surrounded; 65 of its men were killed and some 490 taken prisoner. The 69th Brigade lost about 600 men and the Australians about 400 – with no gain of ground at all.
Eighth Army was exhausted. In his appreciation of the situation of 27 July Auchinleck wrote that the army would not be ready for a new offensive before mid-September, and that Rommel, knowing that time was on the side of the British, would probably attack at the end of August. On 31 July he ordered offensive operations to cease and the position to be strengthened against a new Axis offensive.
Losses
Figures for losses are incomplete and vary from source to source. According to the British official history, Eighth Army lost over 13,000 killed, wounded and missing in July (the figure most often given is about 13,250). The troops of the Dominions and India suffered most: the 2nd New Zealand Division lost about 4,000 men, the 5th Indian Division about 3,000 and the 9th Australian Division – according to Australian figures – 2,552 men in battle. A large proportion of the losses were prisoners from battalions overrun at night.
Axis losses are estimated at about 10,000 killed and wounded and about 7,000 prisoners, the vast majority of them Italians; some studies give a total of about 10,000 including prisoners. The Italian Sabratha, Pavia and Brescia Divisions were destroyed, and the Trieste, Trento and Ariete suffered heavily. The German divisions, although they won most of their clashes with the British armour, dwindled away without replacements.
Significance
The First Battle of El Alamein ended in stalemate on the battlefield, but it was a strategic British victory. The advance of Panzer Army Africa, which since May had carried it from the Gazala Line to the threshold of the Nile Delta, had been stopped. Rommel stood at the end of a supply line more than a thousand kilometres long, with a depleted army and no rear base, while the British had their bases, ports and workshops a few dozen kilometres away. From then on time worked in their favour. New divisions were sailing for Egypt, along with some 300 American Sherman tanks, which Franklin Delano Roosevelt had promised Churchill in Washington on the day Tobruk fell. Malta, whose capture had been postponed for the sake of the pursuit into Egypt, revived in the following months and once again began to sink Axis convoys.
Rommel himself blamed the failure on supplies and on the Italians – although in his notes he stressed that the defeats of the Italian divisions in July were not the fault of the Italian soldier but of Italy’s whole military system, its poor armament and its leadership. Some historians, for their part, accuse him of having once again outrun his own supply base and of blaming his allies for his own mistakes.
Auchinleck’s record is still debated today. His supporters stress that at the worst moment of the desert war he took personal command of a beaten army, kept a cool head, chose the right place to make a stand and stopped Rommel, and that the method of striking at the weaker Italian divisions, worked out with Dorman-Smith, forced the enemy onto the defensive. Rommel himself judged that Auchinleck had handled his forces with considerable skill. Critics point to the series of July counter-attacks – hasty, over-complicated and poorly coordinated – in which the infantry was repeatedly left without tank support, and for which the New Zealanders and Australians in particular paid a heavy price. Dorman-Smith himself was regarded by the Chief of the Imperial General Staff, General Alan Brooke, as a harmful adviser.
In the first days of August 1942 Winston Churchill and Brooke flew to Cairo. The Prime Minister, who had been pressing for weeks for a swift offensive and who at the beginning of July had had to fend off a motion of no confidence in the House of Commons, decided to change the command. Auchinleck was replaced by General Harold Alexander, and Eighth Army was to go to Gott. On 7 August Gott was killed when his aircraft was shot down, and on 13 August Lieutenant General Bernard Montgomery took command. Dorman-Smith also lost his post. Montgomery later claimed credit for saving Egypt, but at the Battle of Alam el Halfa, at the turn of August and September, he repulsed Rommel’s last attack on a position prepared under Auchinleck and according to a plan very similar to the one Auchinleck and Dorman-Smith had drawn up at the end of July. In October and November 1942, at the Second Battle of El Alamein, Eighth Army defeated Panzer Army Africa and forced it into a retreat that ended in May 1943 with the surrender of the Axis forces in Tunisia. July 1942 at El Alamein was thus the last moment at which the Germans and Italians could realistically think of conquering Egypt and the Suez Canal.